RevenueCat is for mobile apps. For web apps, use Stripe.
Overview
Want to monetize your app? RevenueCat makes it simple to add subscriptions and in-app purchases to your iOS app without complex payment code. Instead of wrestling with Apple’s in-app purchase APIs or building your own payment infrastructure, RevenueCat handles subscription management, entitlements, and revenue tracking. You focus on building features; RevenueCat handles monetization. Here’s what you get:- Set up monetization quickly - Configure subscriptions, one-time purchases, and premium features without writing payment code
- Track revenue and growth - Monitor revenue, analyze customer behavior, and understand what’s driving your business
- Test and optimize - Build paywalls, A/B test pricing, and optimize your revenue strategy with real data
Prerequisites
Before you begin, make sure you have:- An iOS mobile app project in Anything
- An App Store Connect account with an active developer program membership
- A RevenueCat account
Setup
Connect your accounts at the platform level
First, connect your accounts at the platform level to enable in-app purchases and subscriptions across all your projects.1
Navigate to Settings
Go to Dashboard > Settings > Accept Payments > Mobile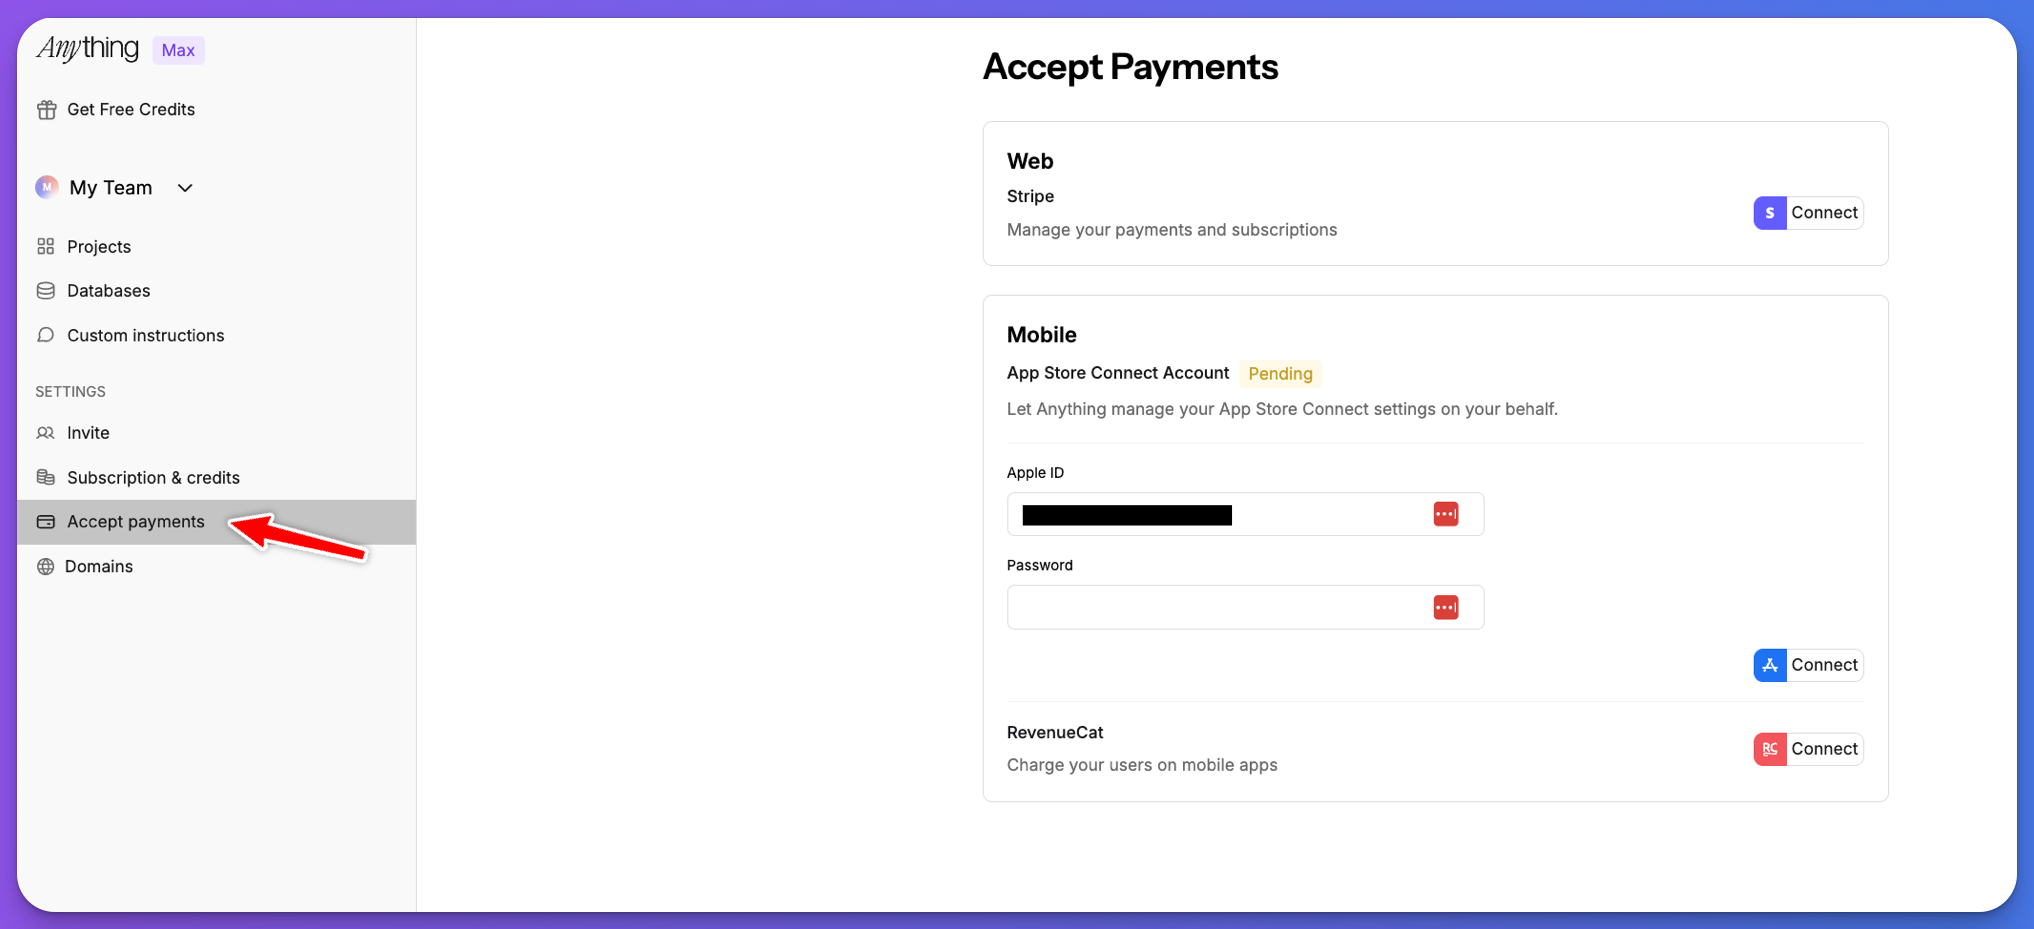
2
Connect App Store Connect
Connect your App Store Developer account to enable in-app purchases and subscriptions.
3
Connect RevenueCat
Connect your RevenueCat account to manage subscriptions and track revenue.
During RevenueCat onboarding, you may see code snippets or packages. Ignore these for now. Anything handles the integration automatically.
Add RevenueCat to your project
After connecting at the platform level, add RevenueCat to your project using the AI agent.1
Open your project
Navigate to the mobile app project where you want to add RevenueCat.
2
Set up RevenueCat
In the chat, ask the agent to set up RevenueCat:The AI builder will automatically connect your project to matching projects in RevenueCat and App Store Connect, or create new ones if needed.
3
Configure products
The agent helps you set up subscription tiers and products. You can define:
- Subscription plans (monthly, yearly, etc.)
- One-time purchases
- Entitlements that unlock features in your app
Reviewing connections (optional): You can review the connections the AI builder made by going to Project Settings > In app purchases. This shows the connected projects in RevenueCat and App Store Connect, but you don’t need to manually configure these—the AI handles it automatically.
How it works
RevenueCat integrates automatically with your mobile app. Here’s how the payment flow works:- Configure products using the AI agent in Anything. For example:
"Create a Pro Level Subscription that is 9.99 USD a month" - Users make purchases through Apple’s in-app purchase system (they see Apple’s payment UI)
- Apple processes the payment and takes their commission (typically 15-30%)
- RevenueCat receives the purchase event from Apple and tracks subscription status
- RevenueCat unlocks features in your app based on entitlements
- You receive payouts from Apple (not RevenueCat) according to Apple’s payout schedule
Testing
Testing in the Anything iOS App
You can test your RevenueCat integration directly in the Anything iOS App on your device. This allows you to:- Test purchases and subscriptions in Apple’s sandbox environment
- Validate paywall functionality before going live
- Test subscription states and payment flows
- Preview your app natively on your device
- Install the Anything iOS App - Download from the App Store and sign in with your Anything account
- Open your project - Your projects sync automatically between devices
- Test natively - Preview and test your app directly on your device with full native functionality
Testing on TestFlight
Submit your app to Apple via our system to test in TestFlight. Test purchases work in TestFlight’s production-like environment. See Publishing to iOS App Store for submission instructions.Production
Once your app is approved and released:- Real payment processing through Apple’s App Store
- Automatic App Store compliance
- Live analytics and customer management in your RevenueCat dashboard
Related Articles
- Mobile Development - Build mobile applications
- Publishing iOS - Deploy to App Store
- Stripe Payments - Web app payments